The WAZER small waterjet is a precise industrial tool. People frequently ask about WAZER’s precision and how to improve its accuracy when cutting. This article and video will cover this topic in detail, sharing findings on WAZER’s precision, our methodology for measuring precision, and tips for using WAZER for optimal accuracy.
For clarity, Accuracy and Precision are two different things, and we’ll address both in this article. To begin, here are their definitions:
- Accuracy means how close a part’s measured dimension matches its CAD drawing.
- Precision means how close a part’s measured dimensions are to each other, when multiples of the same part are cut.
This article and the video below have several parts:
- Part 1 – WAZER’s Precision
- Part 2 – How you can Achieve Optimal Accuracy with your WAZER
- Appendix – Methodology for Measuring WAZER Precision
PART 1 – WAZER PRECISION
The precision that we achieved was +/- 0.004”, for a range of 0.008”.
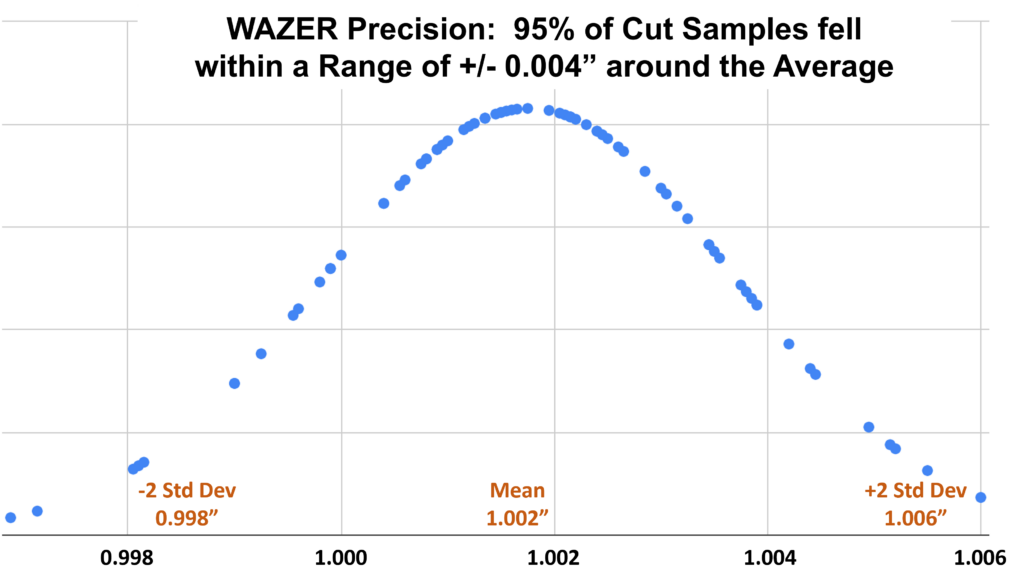
This means that when cutting 75 samples, 95% percent of them measured within a range +/- 0.004” around the average, as shown at left.
- This precision is only for thin sheet material, 0.080” (2mm) or less, which is what was used in our testing
- The cut part samples for this study were relatively small, 1” x 0.75”. Precision may be worse for substantially larger parts.
Please see the Appendix at the bottom of this article for a full walkthrough of our Precision testing methodology.
PART 2 – How you can Achieve Optimal Accuracy with your WAZER
It is not feasible to publish an accuracy spec for WAZER because there are too many factors that impact accuracy, such as: the material being cut and its thickness, how the cut is set up in WAM, how well the material is fixtured onto WAZER’s cutbed, and the maintenance of your machine.
Nevertheless, there are various factors that will have an impact on your accuracy, and helpful techniques you can use to improve part accuracy. Each of these are explored in more detail below:
- Draft Angle
- Fixturing the sheet material to be cut in the WAZER
- Kerf
- Maintenance, including leveling the cutbed
1. THE DRAFT ANGLE
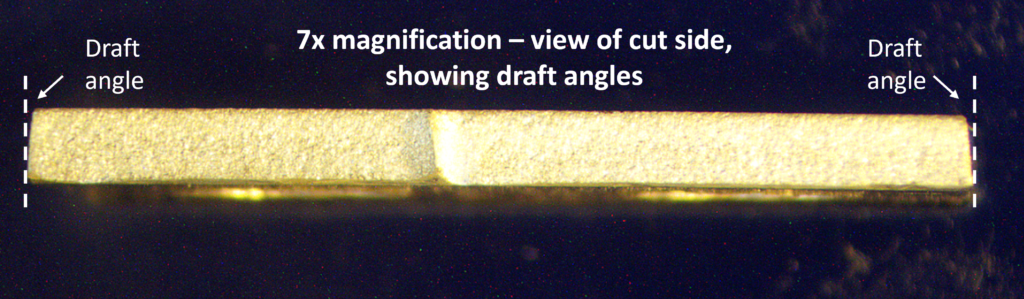
Waterjets such as WAZER typically leave behind a slight draft angle when cutting. This is because the cutting stream has more energy when it hits the top surface of the material being cut, and less energy by the time it cuts to the bottom surface. This causes a wider cut at the top, and a narrower cut at the bottom. The draft angle will vary depending on the cut rate set in WAM, the hardness and thickness of the material.
- For cutting 0.08” aluminum sheet, we measured a draft angle of 6 degrees.
- This means the sides of your part won’t be parallel, and the top edge will be shorter than the bottom edge, as shown in the image below.
- As an illustrative example, for 0.080” aluminum, the difference between the top and bottom edge was: 0.009” (The draft angle will vary with different materials, and different thicknesses of material.)
2. FIXTURING THE SHEET MATERIAL TO BE CUT IN THE WAZER
- Your stock material must remain stationary during cutting, because any movement will negatively impact accuracy.
- Always be sure material is fastened securely to the cut bed.
- Also note that as the outer profile of your part is cut, the fasteners around the exterior of the material are no longer be effective at securing your part.
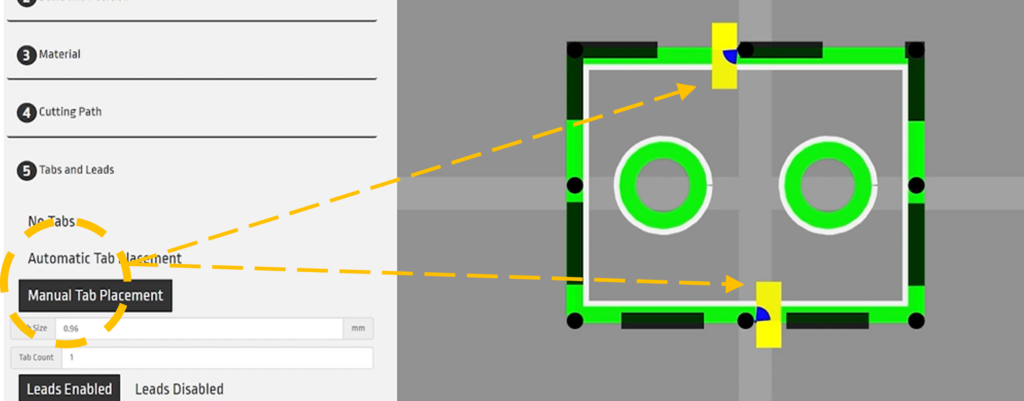
- To resolve this, use tabs to maintain rigidity. For small parts, 1 tab is usually sufficient. For large parts, 2 or more tabs may be necessary. See the WAM screenshot below, for adding tabs.
- If you don’t want tabs, but require highly accurate parts, you can pause your cut after interior features are cut, add screws, and then continue cutting the outer profile.
3. KERF
- For a new nozzle on your WAZER, the mixing tube inner diameter is 0.045”. However, after 300 hours, the mixing tube’s inside diameter will expand slightly, which will deteriorate your cutting accuracy.
- To compensate for changes in the inner diameter, you can adjust your offset in WAM. We call this method “dialing in” your machine.
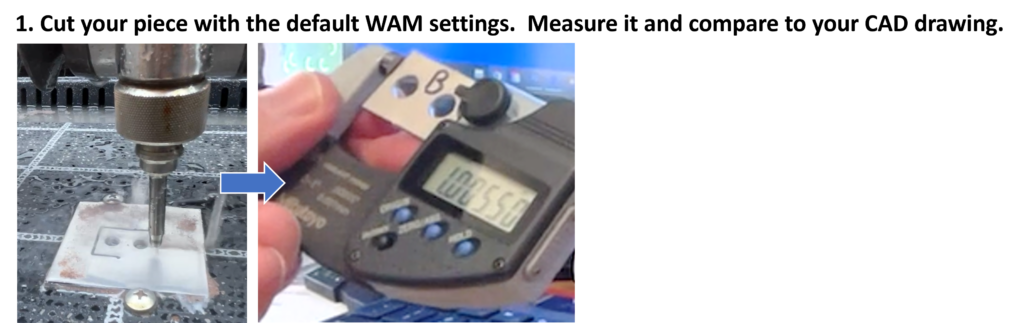
- To do this, start by cutting a piece with the default WAM settings. Measure the piece and compare it to your CAD drawing to determine the difference between them.
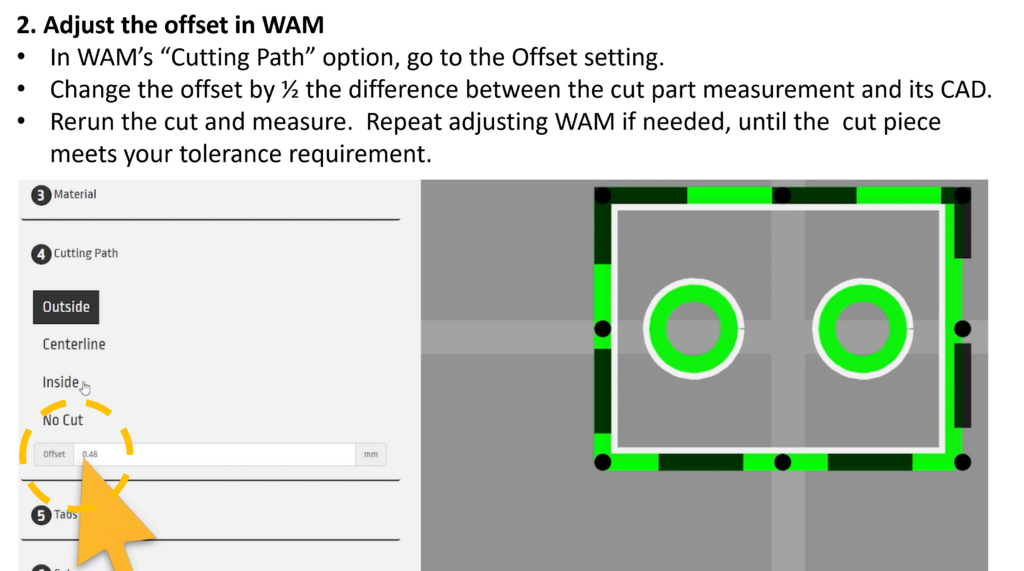
- Then, modify the “cutting path offset” setting in WAM. Change the setting by one-half the difference between the original cut and the CAD specification.
- Rerun the cut and measure again. Repeat this step incrementally until the cut piece is within your desired tolerance.
The WAZER nozzle has a normal lifespan of 300 hours. After 300 hours, the nozzle’s mixing tube will wear causing its inside diameter to expand, deteriorating your cutting accuracy as the cutting stream spreads slightly.
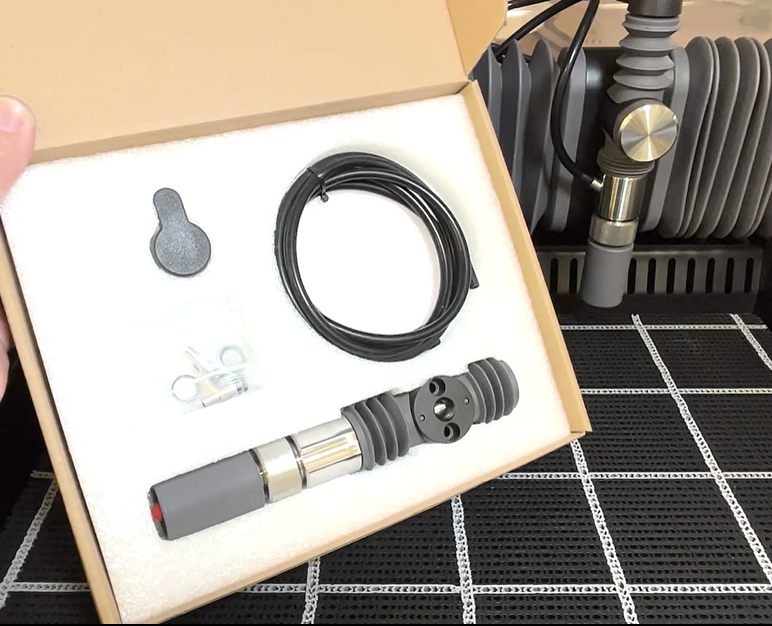
Replacement nozzles are also available at wazer.com, and you can install them yourself following these instructions.
4. MAINTENANCE, INCLUDING LEVELING THE CUTBED
- Ensure you cut bed is level
- Follow recommended maintenance schedule
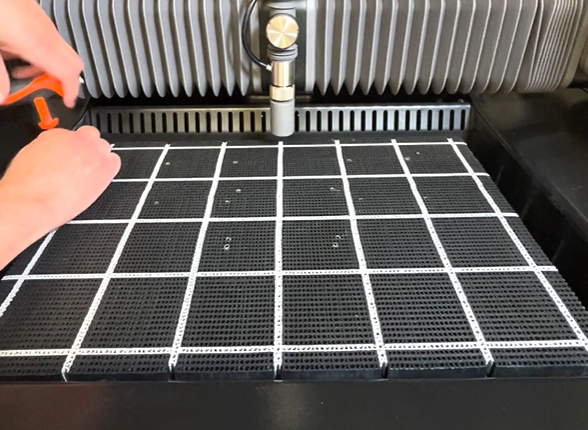
The cutbed on your WAZER needs to be leveled to ensure even cutting across its face. Follow these instructions to level the cutbed.
The cutbed also has a lifespan of 20-100 hours. (It may be flipped over for continued use after the topside wears out.) A fresh cutbed will help with accuracy, as the material being cut can be affixed more firmly.
Replacement cut beds are available on wazer.com, and they install easily in just a few minutes.
The WAZER User Manual includes maintenance for short-term, medium, and long term cycles. With these maintenance routines, your WAZER waterjet will be better able to deliver optimal performance.
Summary
The WAZER waterjet is capable of delivering high levels of accuracy, and precision over repeated cuts. Additionally, you can use the WAZER’s WAM software to further “dial-in” the accuracy to achieve the tolerances that you require.
As with all precision industrial tools, you will achieve superior results by keeping it maintained and replacing worn parts when their duty cycles have been reached.
Feel free to contact us to discuss your questions or your cutting requirements.
APPENDIX – Methodology for Measuring WAZER Precision
WAZER achieved precision of +/- 0.004”, for a range of 0.008”.
Testing Methodology
- Test cuts
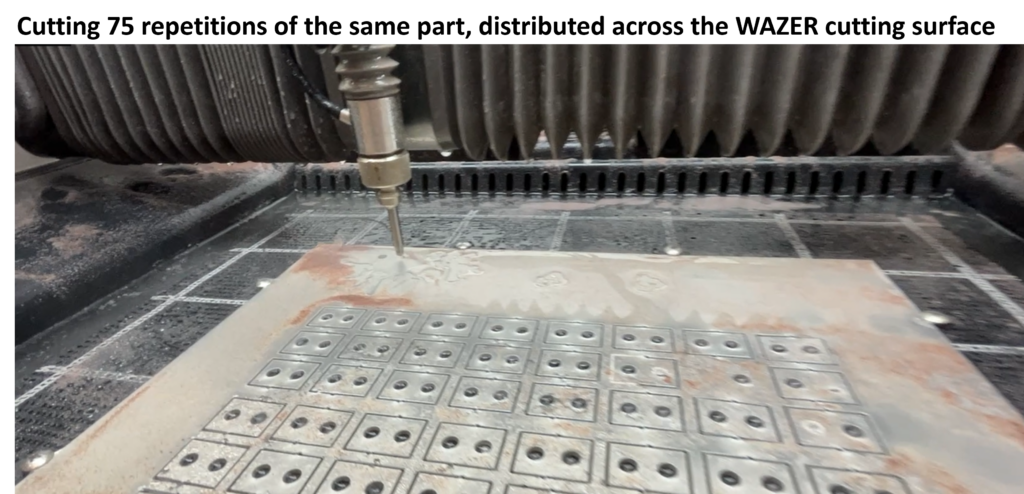
- Using a WAZER, we cut 75 repetitions of the same part
- All parts were cut using the same material: 0.080″ (2mm) aluminum.
- The WAZER cuts were purposely distributed across the WAZER cutbed
- The part was designed with two internal holes, so that we could measure WAZER’s internal feature cutting, as well as the external perimeter cuts
- Using a WAZER, we cut 75 repetitions of the same part
- Measurements
- We collected 225 measurements. For each of the 75 samples, we took 3 measurements: the exterior dimension in both X and Y, as well as the distance between the two holes.
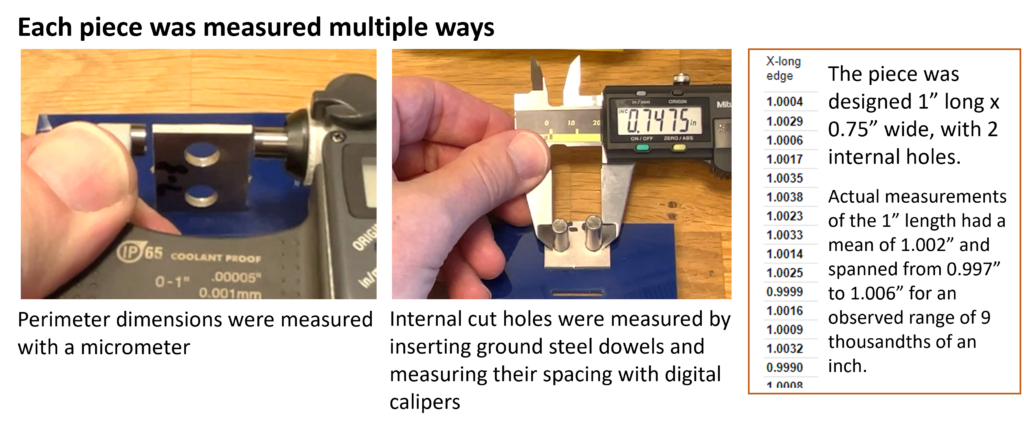
- Each piece was carefully measured in both X and Y, and measurements were also taken of the spacing of internal cut features.
- The external perimeter dimensions of each piece were measured using a micrometer
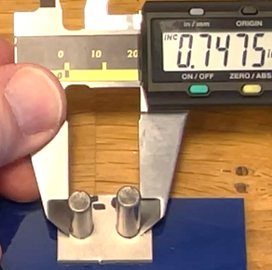
- The internal holes were measured by reaming the interior holes, inserting steel dowels and measuring the space between the dowels with digital calipers
- Results
- The part was designed in CAD to be 1″ x 0.75″, with two interior holes positioned 0.75″ apart at their farthest side.
- External perimeter, long edge. mean = 1.002″; standard deviation – 0.002″
- External perimeter, short edge. mean = 0.757″; standard deviation – 0.001″
- Internal features. mean = 0.747″; standard deviation – 0.003″
- Overall standard deviation = 0.002″
- The part was designed in CAD to be 1″ x 0.75″, with two interior holes positioned 0.75″ apart at their farthest side.
- Precision we achieved was +/- 0.004”, for a range of 0.008”.
- 95% percent of cut parts fell within a range +/- 0.004” around the average.
- Notes:
- This is only for thin sheet material, 0.080” (2mm) or less, which is what we used in our testing.
- The samples that we cut were relatively small, 1” x 0.75”. Precision may be worse for substantially larger parts.
- We defined the Precision spec as being the maximum variation found among the 75 samples that was within 2 standard deviations of the mean. This means there is a 95% chance of achieving this level of precision.