Using a gunpowder powder actuated tool that shoots nails into hard surfaces, such as a Ramset, presents multiple projectile hazards which need to be guarded against. For example, a nail could bounce off a particularly hard or dense surface it is being shot into or the nail could break off a piece of the surface it is being shot into, causing it to ricochet towards the operator. Both of these situations pose a danger to the person operating the tool, especially because the user often has to orient their heads toward the tool in order to get a good view of the nail’s entry point.
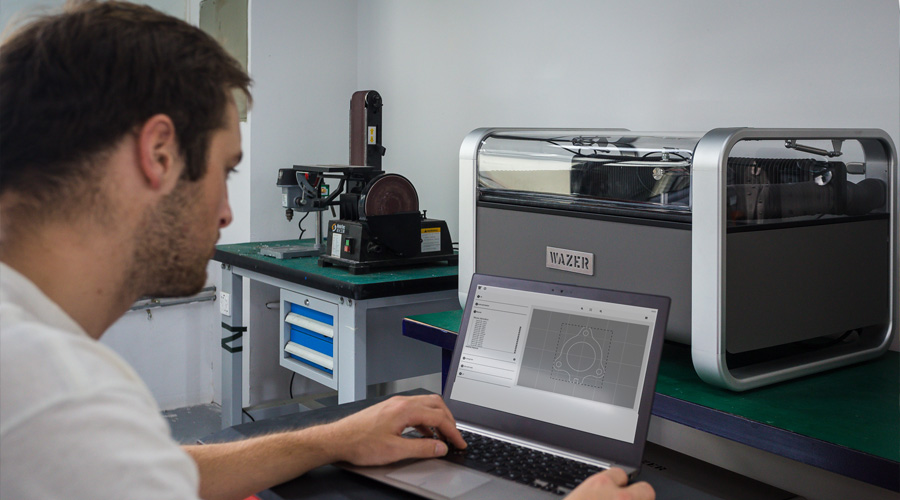
To prevent injuries while using a Ramset, I designed a safety guard that I could attach directly to the tool which would shield my face, neck, and arms from any launched projectiles without limiting the use of the tool. The guard needed to be built out of a material that was transparent, but also resilient against high speed projectiles. The obvious choice was impact-resistant polycarbonate. A CNC waterjet such as the WAZER is the ideal machine to create the shield because it allows me to rapidly prototype the guard, emits no toxic fumes during cutting, requires no special tooling for plastics, does not melt or distort the material while cutting it, and can accurately cut each of the different materials required.
Designing and Cutting the Polycarbonate Guard/Shield
First, I needed to design and manufacture the shield. Ideally the guard would provide as much protection as possible without being too heavy or cumbersome to prevent the Ramset from being positioned at the correct angle to protect the essential areas of the user.

Polycarbonate is an excellent material choice for a safety guard such as this, but the material itself does present some limitations. While it machines well, it does create significant dust and requires specialized tooling to properly cut and drill. Drilling small holes can also lead to cracking, depending on the thickness of the material, and their location on the workpiece. It also should not be laser cut, as it creates poisonous fumes during the laser cutting process. Manual cutting methods tend to create rough edges and lack the accuracy of a CNC process. This is why the WAZER waterjet was the best method to use for cutting and drilling the polycarbonate sheet to create the Ramset shield.
For reference, the dimensions of the the waterjet cut polycarbonate shield are 11.75 x 8.50 inches. In this instance, I designed the holes to be correct for an M3 clearance hole so that I did not have to drill out the holes afterwards and risk cracking the polycarbonate.
By design, the hole that attaches the guard to the Ramset is not centered on the guard. This is because the Ramset user will generally position themselves on the left or right side of the tool, depending on whether they are left or right handed. The offset of the guard on the Ramset allows for extra protection on the side of the tool that the user is positioned. The design is ambidextrous, as the guard can be easily adjusted by loosening the set screws and simply rotating it around the muzzle of the Ramset until the positioning is correct, and then retightening the set screws.
Creating Shaft Collars using the WAZER
The next problem to tackle was how to attach the piece of polycarbonate to my Ramset. I designed a shaft collar that I would be able to cut easily on the WAZER and then finish simply enough using a drill and taps. The shaft collar would then attach to the polycarbonate via 6 M3 screws, and grip the shaft of the Ramset using 2 M5 set screws. To comfortably include the 2 M5 set screws around the outer circumference, I cut the collar out of 0.5” thick aluminum using the WAZER.
I oversized the inside diameter of the collar by 0.02”, making it 0.66” so that it would fit suitably around the 0.64” diameter shaft of the Ramset.
In Solidworks, I included the 6 holes that would attach the shaft collar to the piece of polycarbonate but made them 0.05” in diameter rather than the typical size of a hole that is meant to be threaded for a M3 screw. So, when I opened the file in WAM and selected an outer-line cut path, WAM recognized these holes as pierces. This allowed me to locate where I wanted to put the holes but saved the time of actually cutting them out on the waterjet when I could just drill them out as a post-process operation.

Post Process Operations on the Shaft Collar
After cutting the shaft collar on the WAZER waterjet, I drilled the 6 attaching holes (which had only been pierced previously) to the correct size using a 2.3mm bit and then tapped them using an M3 tap. I then slightly filed down two areas across from each other on the outer circumference of the collar so that I could easily drill two straight holes using a 4.2mm bit which I tapped using an M5 tap.

Assembly and testing
The CNC precision of the WAZER waterjet ensured that the holes in the aluminum shaft collar lined up perfectly with the holes in the polycarbonate guard, so it was easy to put the 6 M3 x 12 screws through the guard and into the collar. The 2 M5 set screws then secured the guard assembly to the muzzle of the Ramset.

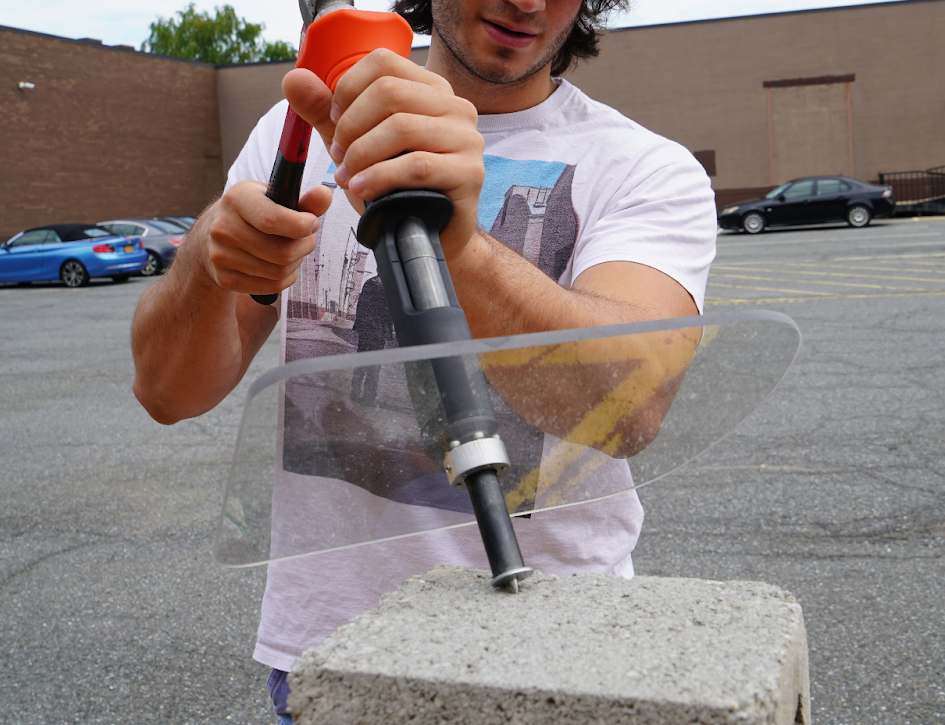
To test the guard, I purchased a concrete block from my local home center that I knew was very susceptible to chipping. I positioned the guard on the Ramset so that the larger portion extended to cover the majority of my body as seen below. After shooting a few nails into the concrete block and being hit by no projectiles, I took a look at the surface of the guard and observed that it was slightly marred from flying debris. This meant that the shield had done its job by keeping any ricocheting objects from hitting me.
All in all, this was a very satisfying project, and I am excited to see where my idea goes from here.